
Compress Images to 200KB
Compress image to 200KB online. Upload images, click compress, and download instantly.
Drop images here or click to upload
Supports: PNG, JPEG, WebP
Note: All image compression happens entirely in your browser. We do not upload or store your images anywhere.
Who actually needs 200KB images?
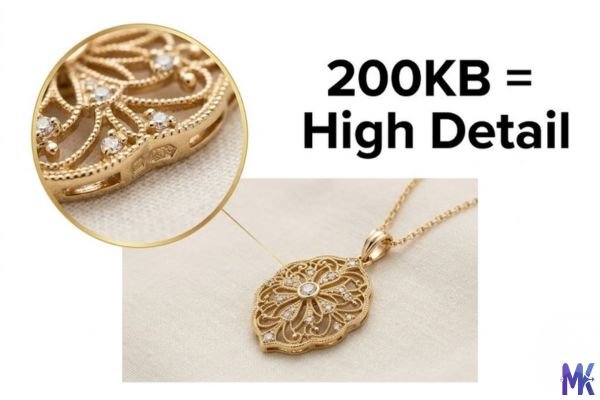
You’re a Shopify store owner and you’ve just photographed your new jewellery collection. The shots are gorgeous every detail of that gold chain, every facet of the stone. Your raw images are 4MB each. You know you need to compress them, but you’ve been burned before: go too aggressive and the jewellery looks cheap, the metal loses its lustre, and suddenly customers aren’t buying. That’s exactly where 200KB becomes your sweet spot. It’s small enough to load fast, but large enough that the fine detail your product depends on actually survives.
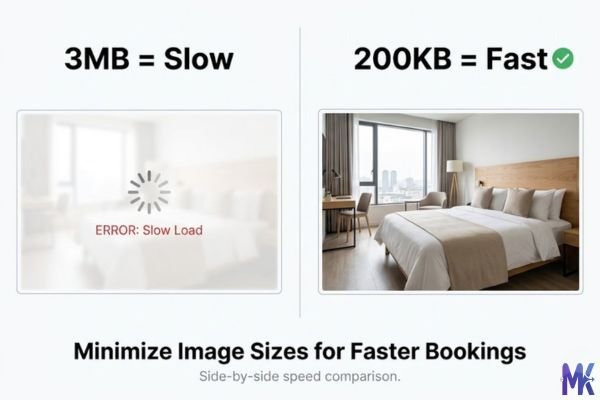
Or maybe you manage hotel listings on Booking.com and TripAdvisor. You’ve noticed that listings with fast-loading images consistently get more clicks and that’s not a coincidence. Booking.com surfaces properties higher in search results when their pages load quickly on mobile, especially for users in regions with slower connections. A 200KB hero photo of your suite loads in under half a second on a 4G connection. A 3MB original? Over 10 seconds. That’s the difference between a booking and a bounce.
Then there are photographers uploading portfolios to Behance or Adobe Portfolio, and Amazon FBA sellers preparing hero images for product listings. These are high-stakes visuals. They need to look professional, yet the platform or the page speed demands they be lean. 200KB sits right in that zone it’s where image quality stops being a real concern and starts being a technical number on a checklist.
Real platforms and websites that require 200KB images
Here’s a practical reference table for where 200KB is either required, recommended, or just optimal based on how those platforms display images:
| Platform | Max Allowed | Common Use | Why 200KB Works |
| Shopify | 20MB (but 200KB recommended) | Main product image | Official Shopify speed guide recommends under 200KB for fastest storefront load |
| Amazon | 10MB | Hero / main product image | Faster A+ Content pages; 200KB loads instantly on mobile browse |
| Booking.com | 10MB | Hotel room & property photos | Smaller photos render faster in search results — more clicks from mobile users |
| Airbnb | Under 5MB recommended | Listing cover photo | 200KB loads near-instantly; listing photos are primary purchase trigger |
| TripAdvisor | 5MB | Restaurant / hotel gallery | Gallery pages load 10x faster with 200KB images; better mobile UX |
| WooCommerce | No hard limit | Main product image | Core Web Vitals (LCP) score improves significantly; better Google rankings |
| Behance | 50MB per project | Portfolio project cover | Faster project loading = visitors see more of your work before bouncing |
| Adobe Portfolio | 10MB per image | Gallery & case study images | 200KB thumbnail loads instantly; first impression is everything for creatives |
| Getty Images (contributor) | Varies | Compressed preview/watermark copy | Used for reference copies and client comps — 200KB is standard for previews |
For Airbnb and Booking.com hosts specifically compressing your listing photos isn’t just a technical task, it’s a business decision. Faster-loading listings appear more complete during mobile searches, which directly impacts click-through rates and booking conversions.
What image quality looks like at 200KB
Let’s be honest about what 200KB actually delivers because this size is genuinely impressive for most use cases, but it does have its ceiling.
For a standard 1200×900px product photo (the kind you’d use on Shopify or Amazon), 200KB preserves virtually everything that matters. Fabric textures, metal finishes, skin tones, food colours they all come through cleanly. If you start with a well-exposed, sharp original, most people simply cannot tell the difference between your original and the 200KB version at normal viewing size.
Quality survival at 200KB by content type:
- Jewellery close-ups — Excellent
- Food photography — Excellent
- Real estate interiors — Excellent
- Portrait / headshots — Excellent
- Landscape photography — Very good
- Text-heavy graphics — Acceptable
- High-res prints (4K+) — Limited
Where 200KB starts to feel its limits: very wide panoramic shots (2400px+), images with large areas of gradient sky or water, and screenshots with small readable text. In these cases, very subtle banding or softness can appear especially if you zoom in. But at standard screen viewing sizes? Most visitors won’t notice.
For PNG images with flat colours (logos, banners, infographics), 200KB is actually generous those often compress to under 50KB with no quality loss. The 200KB target is really designed for rich photographic content where quality matters most.
How to get the best result at 200KB
Hitting 200KB isn’t just about clicking compress it’s about giving the compressor the best input so it gives you the best output. Here’s what actually moves the needle:
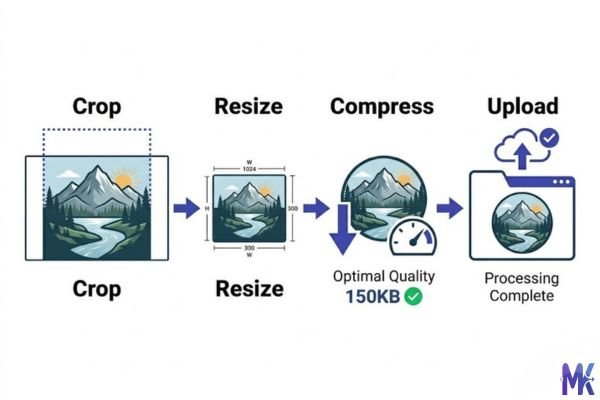
Tip 01 — Crop before you compress If your original is 5000×4000px but you only need 1200×900px, resize it first. Compressing a massive image down to 200KB forces the algorithm to discard more data than necessary. Start with the right dimensions and 200KB delivers much better quality.
Tip 02 — Use JPG for photos, PNG for graphics A product photo as JPG will look noticeably better at 200KB than the same image saved as PNG. JPG’s compression is built for photography. PNGs are better for images with flat colours, hard edges, or transparency logos, icons, badges.
Tip 03 — Keep backgrounds simple if possible White or neutral product backgrounds compress much better than busy, textured ones. If you’re shooting Shopify product photos, a clean background means 200KB will render the product itself beautifully the algorithm doesn’t waste budget on a complex backdrop.
Tip 04 — Don’t over-sharpen your original Heavy sharpening creates high-frequency noise that’s expensive for compression to encode. A naturally sharp photo compresses to 200KB much cleaner than one with artificial sharpening applied in Lightroom or Photoshop.
Tip 05 — Batch your product range at once If you’re uploading a full product collection to Shopify or WooCommerce, this tool lets you drop in multiple images and compress them all to 200KB in one go no need to process each one separately. It saves real time when you have 20 or 30 SKUs to update.
Tip 06 — Check on mobile after compressing Pull up the image on your phone, not just your desktop monitor. Mobile screens are the primary device your customers use and a photo that looks razor-sharp on a 4K monitor might show compression on a bright phone screen at arm’s length.
200KB vs 150KB vs 250KB – which to choose?
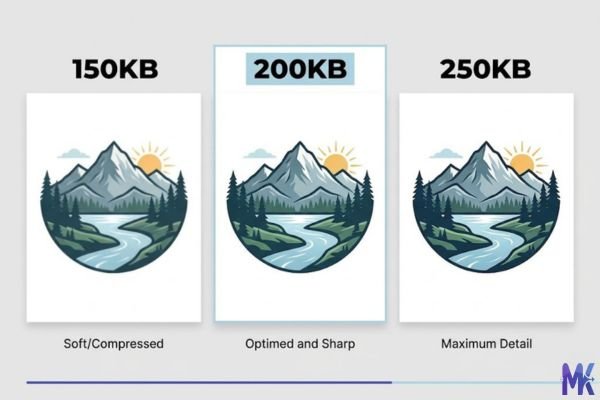
The 50KB difference between these three sizes sounds minor, but for certain use cases it’s the entire difference between “this looks professional” and “this looks compressed.” Here’s the breakdown:
| Factor | 150KB | 200KB | 250KB |
| Best for | Blog thumbnails, preview images, email headers | Product photos, portfolio work, hotel listings | Real estate hero shots, high-detail prints |
| Photo quality | Good — minor softness on fine textures | Near-original — detail preserved well | Excellent — virtually indistinguishable from original |
| Load time (4G) | ~0.4 sec | ~0.5 sec | ~0.65 sec |
| Shopify speed score | Best | Excellent | Very good |
| Detail-heavy subjects | Jewellery may lose sparkle | Jewellery, food, fabric — all preserved well | Overkill for most web use cases |
| Typical original size | 1–5MB DSLR image | 2–8MB DSLR or phone photo | 5–15MB full-resolution original |
The practical rule: if your image is primarily decorative or supplementary (a blog post illustration, a banner background), 150KB is enough. If your image is the thing someone is evaluating before they buy, book, or hire you go 200KB. If you’re showing architectural plans or macro photography where every pixel earns its keep, consider 250KB. But for most professional web use, 200KB is the decision you’ll feel good about.
Common mistakes people make at 200KB
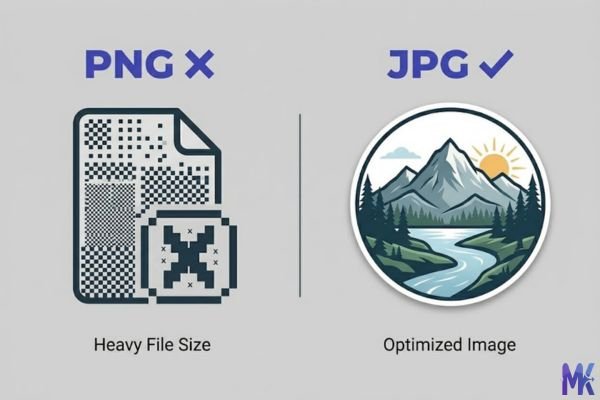
Mistake 01 — Using the wrong format Uploading a PNG photograph and wondering why it looks slightly degraded at 200KB. PNG is lossless it can’t compress photographic content to 200KB without either failing to reach the target or introducing artifacts. If you’re compressing a real photo (product shots, interior spaces, food), use JPG. You’ll get dramatically better quality for the same file size.
Fix: If your image came from a phone or camera, it’s a photograph use JPG. Save PNG for logos, UI screenshots, or graphics with transparent backgrounds.
Mistake 02 — Compressing an already-compressed image You already compressed the image to 300KB, then you try to push it again to 200KB. Each generation of JPEG compression adds artefacts. After two or three passes, the image can develop visible blocking or smearing. This is one of the most common quality issues people blame on the tool but it’s actually the source file.
Fix: Always compress from your original the highest-quality source you have. Never re-compress an already-compressed image. Keep originals archived separately.
Mistake 03 — Compressing way-too-large images Taking a 6000×4000px RAW export (20MB+) and compressing it directly to 200KB. The algorithm has to discard enormous amounts of data to bridge that gap, and the result will never look as good as starting with a properly-sized image. A 200KB budget is well-suited for a 1500×1000px image. At 6000×4000px, you’re asking it to do the impossible.
Fix: Resize your image to the dimensions you’ll actually use (1200–1600px wide for most platforms) before hitting 200KB. The quality difference is significant.
Mistake 04 — Treating 200KB as a universal standard Some sellers compress every single image including tiny thumbnail icons and secondary angle shots to 200KB out of habit. This actually makes some files larger than they need to be (a simple flat-lay icon might naturally sit at 30KB), while over-processing others. It creates unnecessary work and sometimes worse results.
Fix: Use 200KB specifically for your hero / main product images where quality is the priority. For secondary images, thumbnails, and icons, let the output be what it naturally is or target 50–100KB instead.
Latest from Our Blog
Explore image compressor guides, photo resizer tutorials, kilobyte reducer tips, and online image converter tools.
- How Image Compression Works (Beginner Guide + Free Online Tools)
- JPG vs PNG vs WebP — Which Image Format Should You Use?
- How to Compress Images for Government Forms (Free & Easy Guide)

- Reduce Passport Photo Size — Free Online Guide (Step-by-Step)

- Compress Images for Job Application — Free Step-by-Step Guide

- Reduce Image Size Without Losing Quality — Complete Free Guide
- Why Compress Images for Web — The Complete Guide

- Image Compression for Email Attachments — Complete Free Guide

- Bulk Image Compression — Complete Free Guide

Frequently Asked Questions
Practically speaking, yes. While Booking.com and Airbnb don’t publicly share exactly how photo load speed affects ranking, page performance is a well-known factor in how platforms surface listings on mobile. Faster-loading listing photos mean the full gallery appears before a potential guest bounces — and since your cover photo is often the first and only thing they judge you on, a photo that loads in half a second vs five seconds is a meaningful difference in conversions.
Shopify’s official recommendation is to keep product images under 200KB for optimal storefront speed. So “under 200KB” is the goal — using this tool to hit exactly 200KB puts you right at the edge of that recommendation. If you want a small buffer, you might target 180–190KB instead, but 200KB will still satisfy what Shopify is asking for.
Yes, 200KB is genuinely near-original quality for well-shot product photographs at standard web dimensions (1200–1600px wide). Jewellery details, food textures, fabric weaves — they all survive well. If you’re starting from a sharp, properly exposed original and your image is the right size to begin with, most people cannot spot the difference between 200KB and the full-resolution original on a screen.
Amazon’s zoom feature works based on the pixel dimensions of your image, not just the file size. Amazon recommends images be at least 1000px on the longest side to enable zoom. A 200KB JPG at 1600×1600px will still trigger zoom perfectly the compression affects the visual fidelity slightly, but at zoom magnification, differences are minimal unless you started from a very large original. For highest-end jewellery or watch close-ups, consider 250KB if zoom detail is critical.
Yes — image file size directly affects your Core Web Vitals score, specifically the LCP (Largest Contentful Paint) metric, which Google uses as a ranking signal. If your product images are your page’s largest visual element (which they usually are for WooCommerce product pages), getting them under 200KB can meaningfully improve your LCP score. This is especially true for mobile, where Google primarily evaluates your site.
Getty requires full-resolution uncompressed submissions for the actual files they license. However, for watermarked preview versions, client comp images, and reference copies you send to clients before licensing, 200KB is a practical standard – it’s enough quality for client review, but not high enough resolution or quality for commercial reproduction without purchasing the full licence. Always keep your originals completely separate and untouched.
Yes. This tool processes everything directly in your browser — your images are never sent to any server. The compression happens locally on your device using browser-side technology. Nothing is uploaded, nothing is stored, and nothing leaves your computer. This makes it particularly useful for confidential product photos, unreleased design work, or any images you wouldn’t want passing through a third-party server.