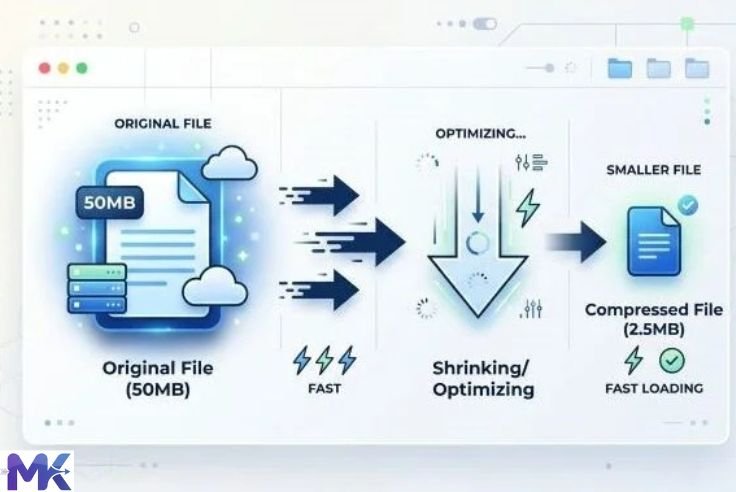
You have a beautiful, sharp image. Maybe it is a product photo, a portfolio shot, or a graphic you worked hard on. Now you need to upload it somewhere and suddenly the file is too large.
The first thought most people have is: “If I compress it, it will look blurry.”
That fear is understandable. But it is mostly not true.
You absolutely can reduce image size without losing quality or at least without any quality loss your eyes can actually see. The key is knowing which method to use, which format to choose, and how much compression is safe for your specific image.
This guide explains everything clearly. No confusing technical terms. Just practical steps you can follow right now to get smaller images that still look sharp and professional.
What Does “Losing Quality” Actually Mean?
Before anything else, let us clear up what quality loss really means because most people imagine something far worse than what actually happens.
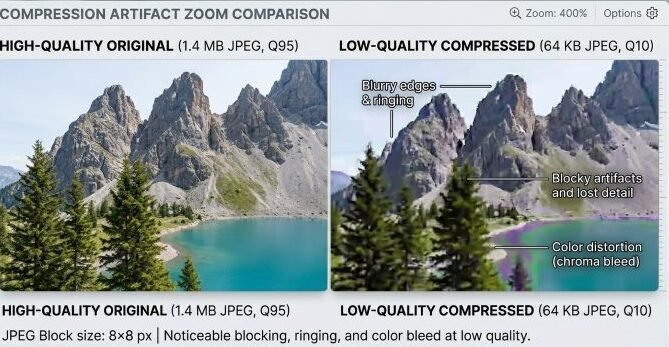
When an image loses quality visibly, you see things like:
- Blurry edges on text or logos
- Blocky patches of color in photos (called compression artifacts)
- Loss of fine detail — like strands of hair or fabric texture becoming smudged
- Colors that look slightly off or faded
This kind of visible quality loss only happens when you compress too aggressively usually trying to shrink a large image down to an unreasonably tiny size.
For most everyday uses websites, email attachments, job applications, social media, online forms you can reduce image size by 60%, 70%, even 90% and the image will look completely identical to the human eye.
The data that gets removed during compression is data your eyes were never processing in the first place.
Why Image Size Matters
Reducing image size is not just about passing an upload limit. It has real, practical benefits across almost every use case.
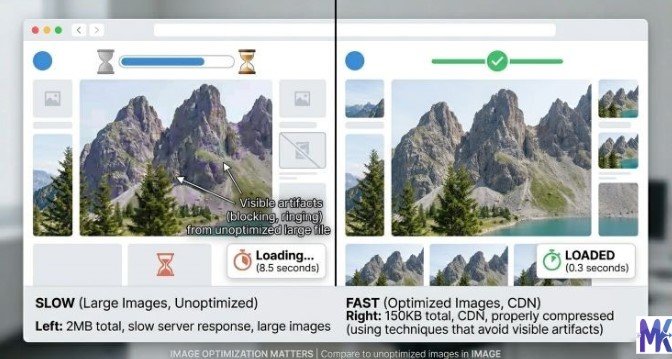
Faster Website Loading Images are the heaviest files on most web pages. A page full of uncompressed photos can take 8 to 10 seconds to load. The same page with compressed images loads in 1 to 2 seconds. Visitors stay. Bounce rates drop.
Better SEO Rankings Google uses page speed as a direct ranking factor. Faster pages rank higher. Compressing your images is one of the quickest wins you can get for SEO without touching a single line of code.
Easier File Sharing Sending images over WhatsApp, email, or any file transfer platform becomes much faster when files are smaller. Some platforms cap attachments at 5MB or 10MB compressed images pass those limits easily.
Less Storage Space Whether it is your phone, your laptop, or cloud storage smaller images take up less room. If you store hundreds or thousands of images, compression can free up significant space.
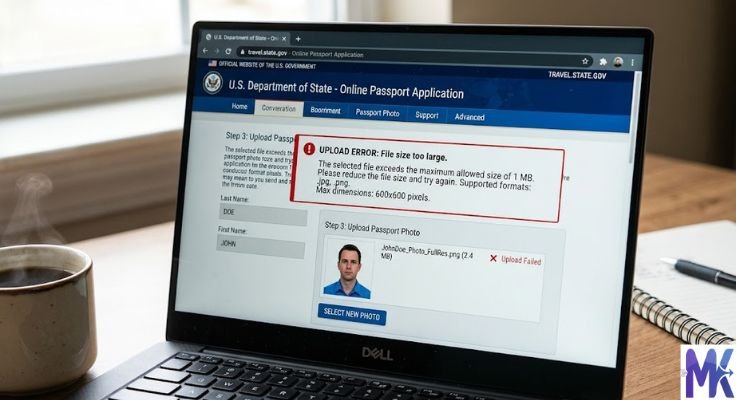
Faster Uploads to Portals Government forms, job applications, college admissions, bank KYC all of these have strict file size limits. Compressed images pass these limits without any visible quality difference.
The Two Types of Image Compression
Understanding this distinction helps you choose the right approach for your situation.
Lossless Compression
Lossless compression reduces file size without removing any image data. Every single pixel is preserved exactly as it was. The image is mathematically identical to the original just stored more efficiently.
The result is a smaller file with zero quality loss. Truly zero.
The trade-off is that lossless compression does not reduce file size as dramatically as lossy compression. You might go from 2MB to 1.2MB a meaningful reduction, but not a dramatic one.
Best for: Logos, icons, text graphics, illustrations, screenshots, any image where pixel-perfect accuracy matters.
Common format: PNG
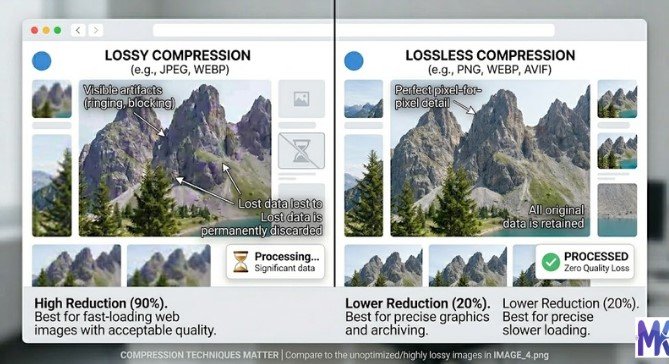
Lossy Compression
Lossy compression achieves smaller file sizes by permanently removing some image data specifically, the data that is least noticeable to the human eye.
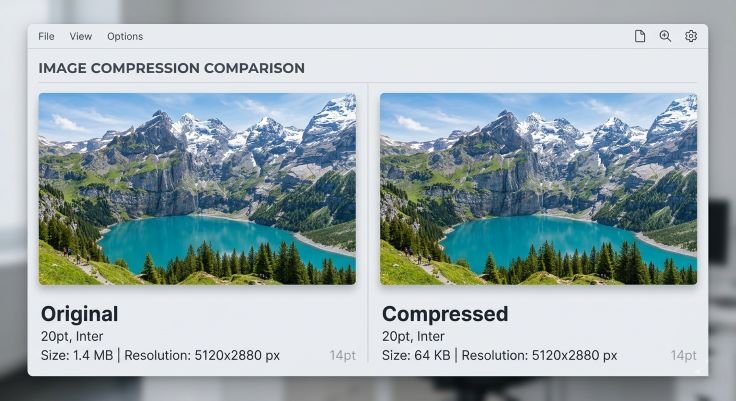
The result is a much smaller file. A 3MB photo can become 200KB or even 80KB and still look sharp and professional on screen.
The trade-off is that some data is permanently gone. However, at moderate compression levels, this is completely invisible unless you zoom in to 400% and compare side by side.
Best for: Photographs, product images, social media content, blog images, any photo with complex colors and gradients.
Common format: JPG, WebP
Which Image Format Gives You the Best Quality at the Smallest Size?
Format choice is just as important as compression level. Using the wrong format can make your file unnecessarily large or cause visible quality loss at smaller sizes.
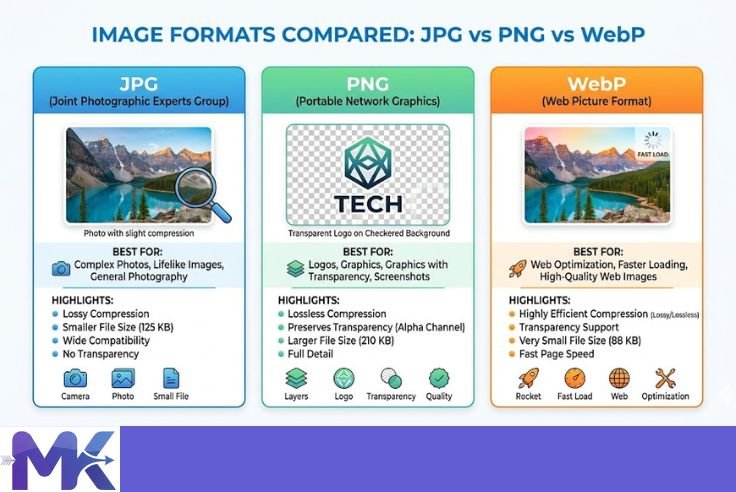
JPG — Best for Photos
JPG is the standard for photographs. It uses lossy compression but does it intelligently removing color variation in areas where your eyes are least sensitive.
A well-compressed JPG photo at 80% quality looks identical to the original. At 60% quality, still very close. Only when you drop below 40% do most people start noticing any difference.
Use JPG when: your image is a photograph, a product shot, a portrait, or any image with complex colors and gradients.
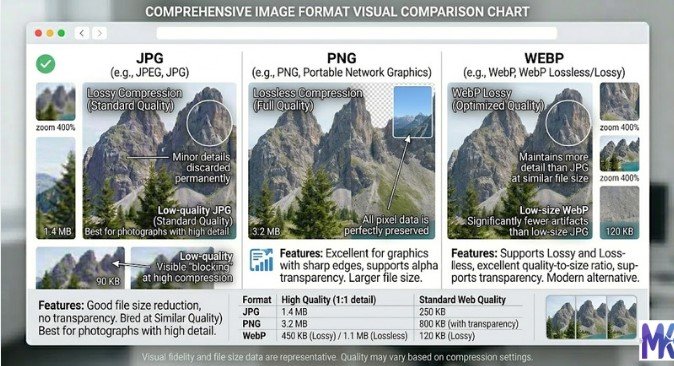
PNG — Best for Graphics with Sharp Edges
PNG uses lossless compression. It is the right choice for logos, icons, text-based images, and anything with a transparent background.
PNG files are larger than JPG for the same photograph so never use PNG for photos if file size matters.
Use PNG when: your image has sharp edges, flat colors, text, or a transparent background.
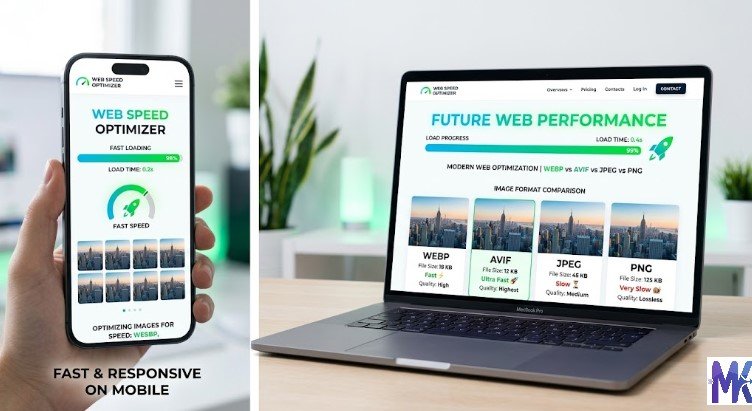
WebP — Best of Both Worlds
WebP is a modern format developed by Google. It supports both lossy and lossless compression and consistently produces smaller files than both JPG and PNG at the same visual quality.
A photo that is 500KB as a JPG might be 300KB as a WebP with no visible quality difference. A graphic that is 200KB as a PNG might be 120KB as a WebP.
Use WebP when: you are optimizing images for a website and want the smallest possible file size at the best quality.
Methods to Reduce Image Size Without Losing Quality
There are several approaches. The right one depends on how much you need to reduce the file and what you are using the image for.
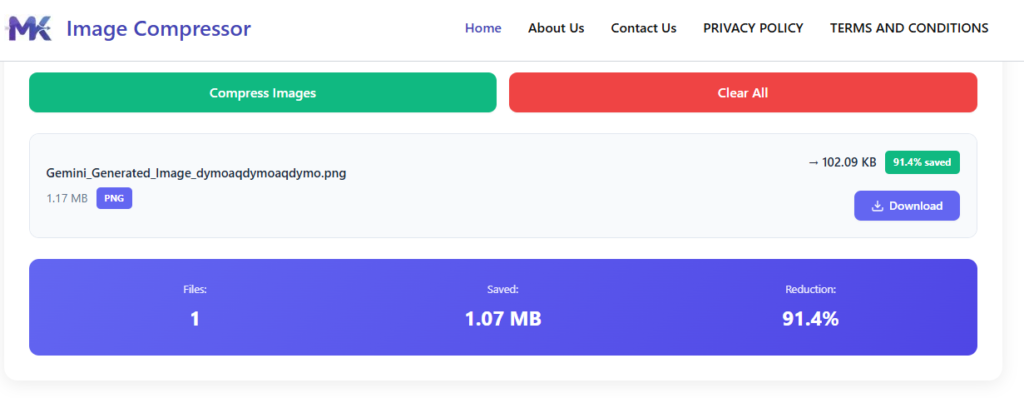
Method 1 — Use an Online Compression Tool (Easiest)
This is the fastest and most practical option for most people. No software, no technical knowledge needed.
Go to mbtokb.site. Upload your image or multiple images at once and choose your target file size. The tool compresses your image intelligently, removing only the data that has the least visible impact on quality.

You can either enter a custom target size in KB (for precise control) or choose from fixed options like 50KB, 100KB, 150KB, 200KB, and more.
The entire process takes under a minute. Your compressed image downloads directly to your device. Nothing is stored online everything runs in your browser, so your files stay completely private.
This method works especially well when you need to compress images for a specific purpose like an online form that requires images under 100KB, or a website where you want to reduce loading time.
Method 2 — Strip Metadata (Hidden Size You Cannot See)
Every image taken by a phone or camera contains hidden data called metadata. This includes information like:
- GPS location where the photo was taken
- Camera model and settings (aperture, shutter speed, ISO)
- Date and time
- Copyright information
- Software used to edit the image
None of this is part of the actual picture. You never see it on screen. But it adds to the file size sometimes significantly.
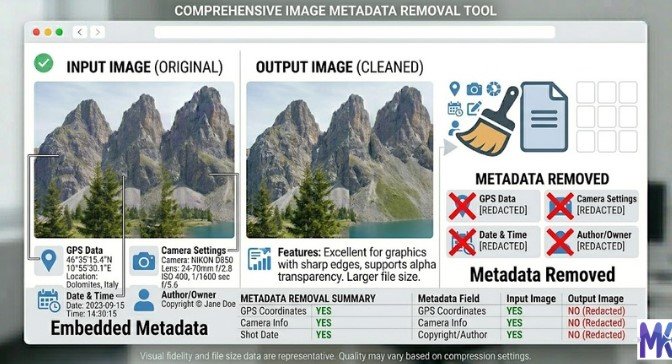
Stripping metadata alone can reduce a file by 10% to 30% with absolutely zero visual quality change, because the visible pixels are completely untouched.
Most good compression tools including mbtokb.site handle this automatically as part of the compression process.
Method 3 — Reduce Image Dimensions
Sometimes an image is large in file size simply because it is enormous in pixel dimensions. A photo straight from a DSLR camera might be 6000×4000 pixels. For a website thumbnail, you only need 800×600.
Those extra pixels are pure waste they add file size but serve no purpose at the display size you actually need.
Reducing dimensions from 6000×4000 to 1200×800 reduces the number of pixels by 95%. File size drops dramatically and the image looks identical at normal viewing size because you were never going to display it at full resolution anyway.
This is true lossless quality reduction you are removing pixels that were invisible to begin with.
Method 4 — Convert to a More Efficient Format
If you are storing images as PNG when they should be JPG, or as JPG when they could be WebP switching formats alone can cut file size significantly without touching compression at all.
- PNG photo → JPG: Often 60% to 80% smaller
- JPG photo → WebP: Often 25% to 40% smaller
- PNG graphic → WebP lossless: Often 20% to 35% smaller
Format conversion is one of the most underused techniques for reducing image size without losing quality.
Step-by-Step: Reduce Image Size Without Losing Quality Using mbtokb.site
Here is the complete process.
Step 1 — Identify What You Need
Ask yourself two questions before starting:
What is this image for? (Website, email, form upload, social media, storage)
What is the maximum acceptable file size? (Check the platform’s requirements, or aim for under 200KB for web use as a general rule)
Step 2 — Check Your Current File Size
Windows: Right-click the image → Properties → General → Size
Mac: Right-click → Get Info → Size
Android: Gallery → tap image → menu → Details
iPhone: Photos app → tap image → swipe up
Note the current size. This tells you how much compression you need.
Step 3 — Open mbtokb.site
Go to mbtokb.site in any browser on any device. No account needed.
Step 4 — Upload Your Image or Images
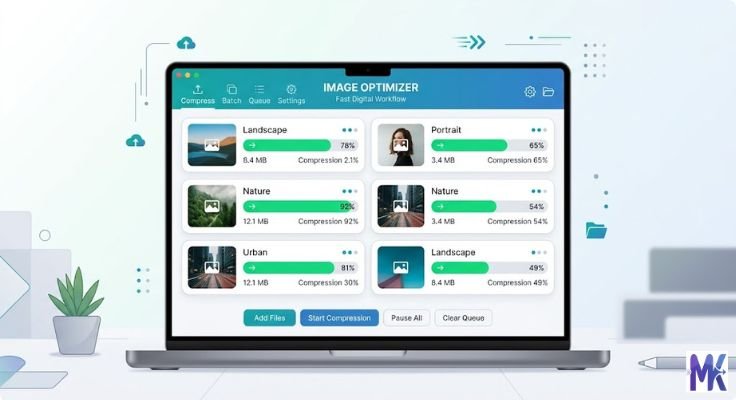
Click upload and select your image. If you have multiple images to compress for example, all the photos for a blog post or a set of product images select them all at once. mbtokb.site compresses multiple images simultaneously with one click, saving significant time compared to processing them one by one.
Step 5 — Choose Your Target Size
Custom size: Type in your exact target in KB. For web images, 100KB to 200KB is a good starting point. For form uploads, match the portal’s limit exactly.

Fixed size: Choose from the preset options 50KB, 100KB, 150KB, 200KB, 250KB, 300KB, 350KB depending on your need.
Step 6 — Compress
Click the Compress button. Processing is fast a few seconds for most images.
Step 7 — Check and Download
Open the compressed image and look at it at normal viewing size. Does it look sharp? Are edges clear? Are colors accurate?
If yes — download it. Your image is ready.
If it looks too soft go back and compress to a slightly higher target size. The difference between 80KB and 120KB is often invisible, and the slightly larger file preserves more detail.
👉 Try It Free at mbtokb.site — Upload Multiple Images at Once
How Much Can You Compress Before Quality Becomes Visible?
This is the question everyone actually wants answered. Here is a realistic guide:
| Original Size | Compressed To | Quality Impact |
| 5MB photo | 500KB | None visible |
| 5MB photo | 200KB | None visible |
| 5MB photo | 100KB | Barely visible at full zoom |
| 5MB photo | 50KB | Slight softness, acceptable for most uses |
| 5MB photo | 20KB | Noticeable quality loss |
| 5MB photo | 10KB | Significant quality loss |
For most real-world uses websites, applications, email, social media compressing to 100KB to 300KB produces results that are indistinguishable from the original at normal viewing size.
Only push below 50KB if you have a strict requirement that demands it, like certain government form uploads.
Common Mistakes That Cause Visible Quality Loss
Avoiding these mistakes keeps your compressed images looking sharp.
Compressing the same image multiple times Every time you open, edit, and re-save a JPG, it recompresses and loses a little more data. Always keep the original file and compress a copy. Never compress a compressed image.
Starting with a low-quality original Compression cannot add detail that was never there. If your original photo is blurry, dark, or low resolution, the compressed version will look worse. Always start with the best quality original you have.
Using the wrong format Saving a logo or screenshot as JPG causes visible blurring around edges because JPG is not designed for flat colors and sharp lines. Use PNG for those. Using PNG for photos makes files unnecessarily large. Match format to image type.
Compressing to an unnecessarily tiny size If the portal allows 100KB and you compress to 20KB trying to be safe, you are sacrificing quality for no reason. Compress to the limit, not far below it.
Ignoring dimensions A 6000-pixel-wide image compressed to 100KB will look worse than the same image resized to 1200 pixels and then compressed to 100KB. Resize first, then compress.
Best Practices by Use Case
For websites: Target 100KB to 200KB per image. Use WebP where possible. Use JPG for photos, PNG for logos. Compress all images before uploading never upload straight from a camera.
For email attachments: Keep images under 500KB each. Most email clients struggle with large image attachments and may compress them automatically and badly.
For government and job application forms: Match the portal’s exact size limit. Use JPG. Compress to just under the limit, not far below it.
For social media: Platforms recompress your images anyway when you upload them. Upload at around 500KB to 1MB large enough to survive their recompression and still look sharp.
For phone storage: Convert large RAW or high-resolution photos to compressed JPG at 80% quality. You will free up significant space with no visible change on a phone screen.
For bulk processing: Use mbtokb.site’s bulk upload feature. Select all images at once, set your target size, compress everything in one click, and download all images at once or individually.
Frequently Asked Questions
Yes, within limits. Moderate compression, stripping metadata, reducing dimensions, and choosing efficient formats all reduce file size with zero or imperceptible quality change. The key word is moderate. Extreme compression always causes visible quality loss eventually.
mbtokb.site is a free, browser-based tool that lets you set a precise target size and compresses intelligently to hit it. It supports bulk uploads, works on any device, and never stores your images online.
Open mbtokb.site in your phone’s browser. Upload your image, choose your target size, and download the compressed file. No app installation required.
For screen use websites, apps, emails compression at typical levels is invisible. For printing, compression can affect quality because printers operate at much higher detail levels than screens. For print, reduce dimensions rather than compressing heavily.
Yes. mbtokb.site supports bulk compression. Upload as many images as you need at once and compress them all together with a single click.
Resizing changes the pixel dimensions width and height. Compressing reduces file size while keeping the same dimensions. Both reduce file size, and combining both gives you the smallest file with the best quality.
Conclusion
Reducing image size without losing quality is not a compromise it is a technique. Done correctly, the compressed image looks identical to the original. The data that gets removed is data your eyes were never seeing anyway.
Use the right format for your image type. Strip unnecessary metadata. Resize dimensions if they are larger than needed. And use a reliable compression tool to hit your exact target size.
mbtokb.site makes all of this easy and free. Upload one image or a hundred at once, choose your target size custom or fixed and download compressed files that look sharp, load fast, and pass any upload limit.
No software. No sign-up. Nothing stored online. Just smaller images that still look great.