Every time you visit a website, your browser loads images. And if those images are too large, the page feels slow like waiting for a bus that’s always late.
Large image files are one of the biggest reasons websites load slowly. They eat up bandwidth, frustrate users, and can even hurt your rankings on Google.
That’s where image compression comes in. It’s a simple process that reduces the size of your image files without making them look terrible. Whether you need to compress an image to a specific size like 50KB, 100KB, or 150KB or just make it smaller in general, online tools make the whole thing incredibly easy.
In this guide, you’ll learn how image compression works, why it matters, and how to use a free bulk image compressor to get the job done in seconds.
What Is an Image?
Think of any photo on your phone. Now imagine zooming in really, really close. What do you see? Tiny little squares of color those are called pixels.
Every digital image is made up of thousands (or even millions) of these tiny dots. Each pixel holds color information, and together, they form the full picture you see.
A small image might have 800 × 600 pixels. A large one might have 4000 × 3000 pixels that’s 12 million pixels. More pixels means more data, and more data means a bigger file size.
What Is Image Compression?
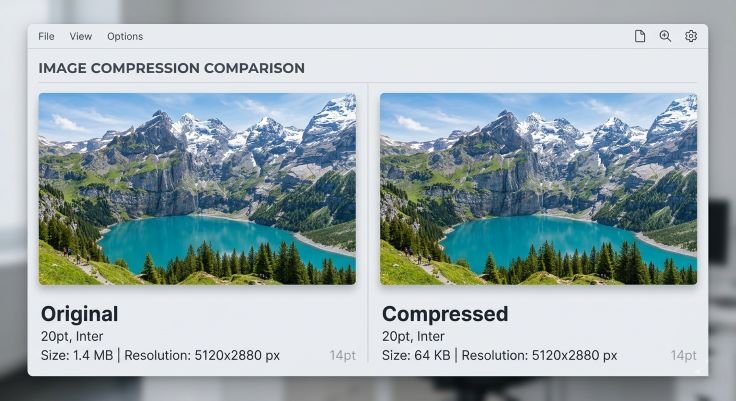
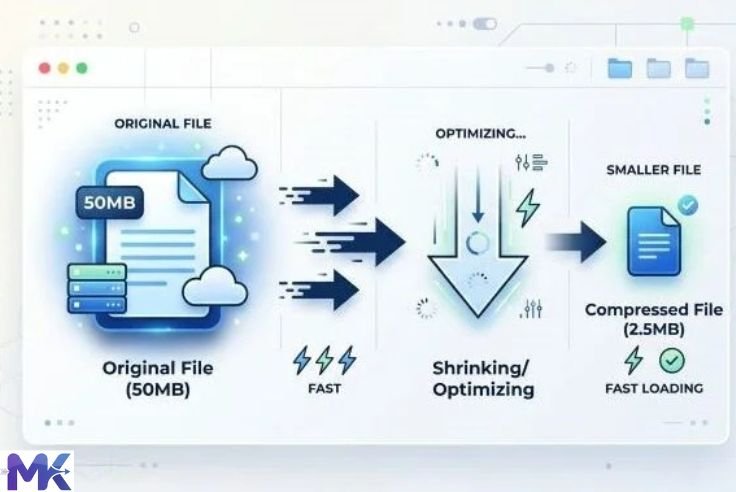
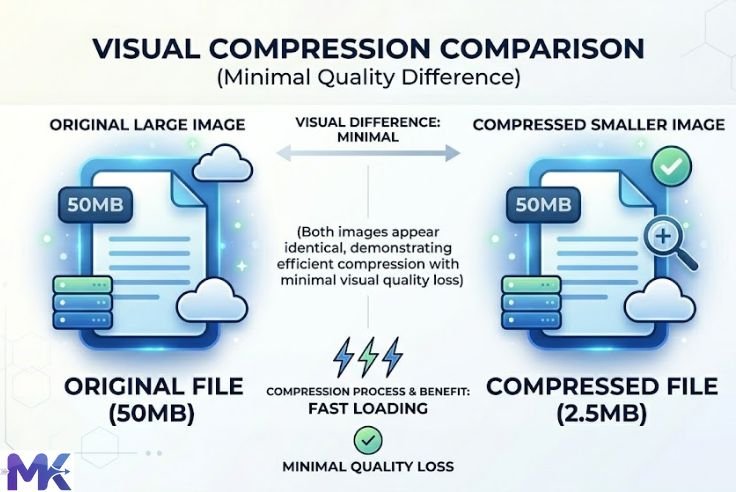
Image compression is the process of reducing the file size of an image by removing or reorganizing its data.
The goal is simple: make the file smaller so it loads faster, takes up less space, and transfers more quickly all while keeping the image looking as good as possible.
Think of it like packing a suitcase. Instead of stuffing everything in randomly, you fold clothes neatly and remove things you don’t really need. You still have most of what you need, but the bag is much lighter.
That’s exactly how image compression works.
Why Image Compression Matters
You might wonder: does it really make a difference? Yes a big one.
Faster Website Performance
Large images make web pages load slowly. Studies show that most users leave a website if it takes more than 3 seconds to load. Compressing images can cut load time significantly.
Reduced Bandwidth Usage
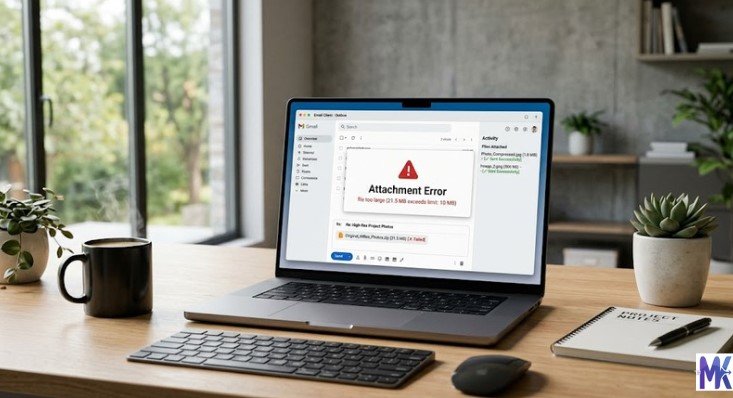
Every time someone visits your page, their device downloads your images. Smaller images mean less data transferred, which saves bandwidth especially important if you’re paying for hosting or serving millions of visitors.
Better User Experience
Nobody likes waiting. When a website loads fast and looks clean, users stay longer, click more, and come back again.
Improved SEO Rankings
Google uses page speed as a ranking factor. Faster pages rank higher. Compressing your images is one of the easiest ways to boost your site’s SEO without changing a single line of code.
Types of Image Compression
There are two main types of image compression. Each works differently and suits different use cases.
Lossy Compression
Lossy compression reduces file size by permanently removing some image data. The idea is to remove details that the human eye can barely notice anyway.
The result? A much smaller file with a slight drop in quality. For most uses websites, social media, blogs the quality loss is almost invisible.
The most common example is JPEG. It’s why most photos you see online are in JPEG format. Small size, good quality, works everywhere.
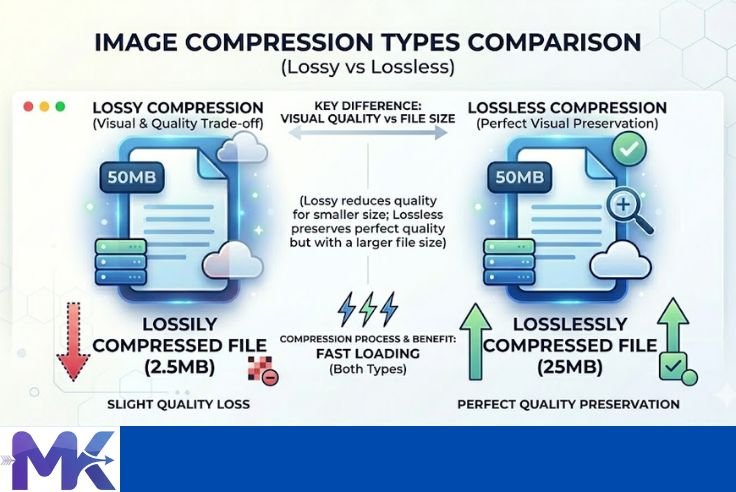
Lossless Compression
Lossless compression reduces file size without throwing away any data. Every single pixel is preserved exactly as it was.
The file is still smaller than the original, but the savings aren’t as dramatic as lossy compression. However, the image quality is perfect no difference from the original.
PNG is the best example. It’s great for logos, graphics, icons, or any image where sharp edges and exact colors matter.
How Image Compression Works (Step-by-Step)
Now let’s look at the actual process. Understanding how image compression works helps you make smarter choices when choosing tools and formats.
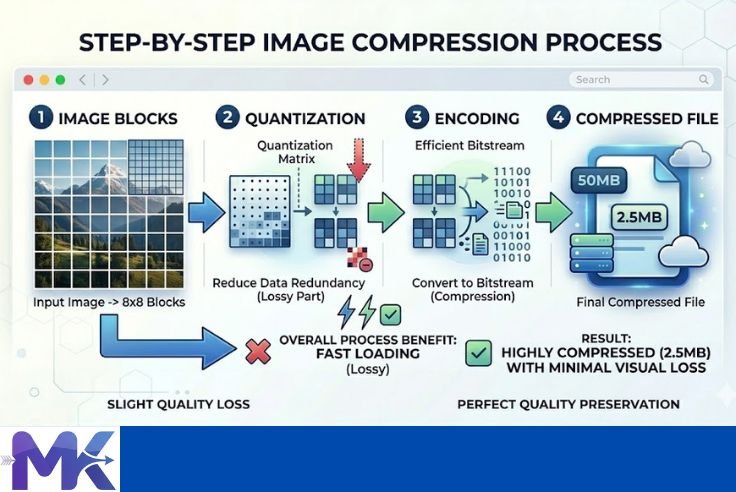
Step 1 — Transforming the Image
The first step is to break the image into small blocks of data. Instead of looking at the image as one big picture, the algorithm divides it into tiny sections usually 8×8 pixel grids.
Each block is then converted into numbers that represent the color and brightness of that area. This mathematical form is easier to work with and compress.
Step 2 — Quantization
Once the image is in data form, the algorithm identifies which details are important and which aren’t.
Less important details like tiny variations in color that the eye can’t easily spot are simplified or removed. This is the step where lossy compression happens.
Think of it like rounding numbers. Instead of saying 98.745, you say 99. You lose a tiny bit of accuracy, but it’s close enough and much easier to store.
Step 3 — Encoding
Finally, the remaining data is stored in a more efficient way using smart codes.
For example, instead of writing “white pixel, white pixel, white pixel” 100 times, the system writes “100 white pixels.” This is called run-length encoding, and it dramatically reduces the amount of data needed.
The result is a smaller file that can be decoded back into an image when someone opens it.
Common Techniques Used in Image Compression
Beyond the basic steps, compression tools use several clever techniques to shrink files even further.
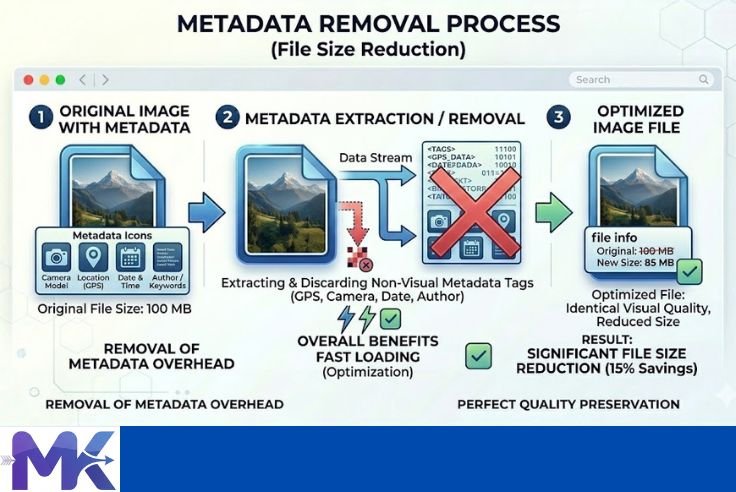
Removing Unnecessary Data
Images often carry extra information that isn’t part of the picture itself things like camera settings, GPS location, date and time. This is called metadata.
Stripping this data out can reduce file size without touching a single pixel of the actual image.
Detecting Patterns
Many images have large areas of similar color a clear blue sky, a white background, a solid-colored wall. Instead of storing every individual pixel separately, compression algorithms detect these patterns and store them as a single instruction.
It’s like saying “draw 500 blue pixels in a row” instead of recording each one individually.
Efficient Encoding
Different types of data are given shorter or longer codes based on how often they appear. Frequent colors and patterns get shorter codes; rare ones get longer codes.
This is similar to how common words in English are shorter (like “a” or “is”), while rare words tend to be longer. The result is a more efficient file overall.
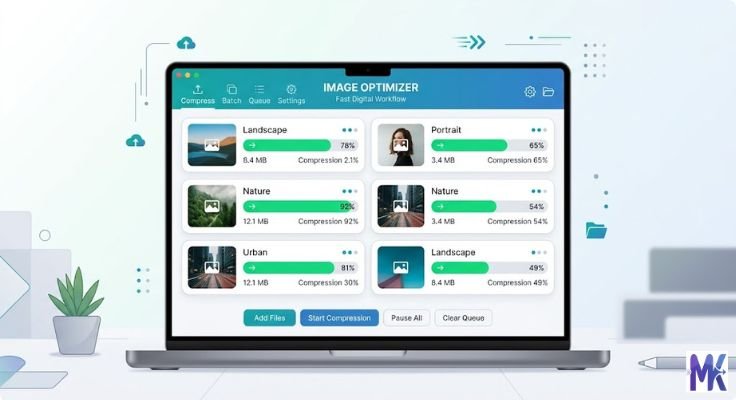
How Our Image Compression Tools Work
At mbtokb.site, we’ve built free online tools that make compression simple even for complete beginners. You don’t need to install anything. No sign-up required. Everything happens right in your browser.
Custom Size Compression Tool
Sometimes you need an image to be a very specific size.
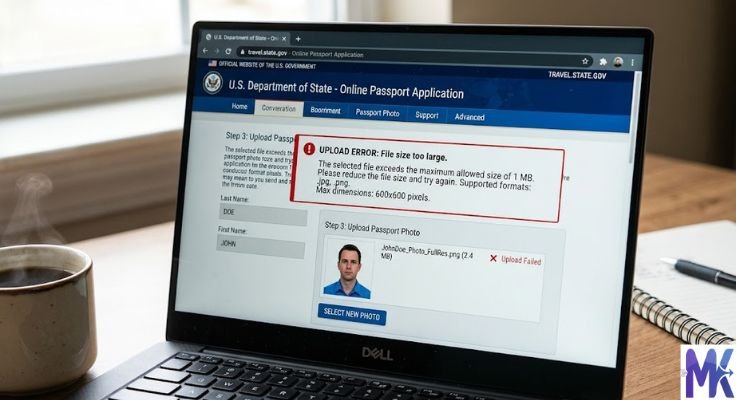
For example, an online form might only accept files under 80KB, or a client might ask for images no larger than 120KB.
Our custom size compression tool lets you enter any target size you want. Just type in a number like 80KB or 120KB and the tool will compress your image as close to that size as possible.
It’s ideal for government forms, job applications, registration portals, or any platform with strict file size requirements.

Fixed Size Compression Tools
Don’t want to think about numbers? No problem.
We also offer one-click fixed-size compression pages. Just pick the size you need:
– Compress to 50KB
– Compress to 100KB
– Compress to 150KB
Click once, and the tool does everything automatically. It’s fast, simple, and perfect for beginners.

Key Features of Our Tools
Here’s what makes mbtokb.site stand out:
Bulk Image Compression — Upload multiple images at once and compress them all with a single click. No need to compress one file at a time. This saves a lot of time if you’re working with product photos, portfolio images, or a batch of scanned documents.
Fast Processing — Compression happens quickly, even for multiple files.
Works in the Browser — No software to download. No app to install. Just open the page and start compressing.
Privacy-Friendly — Your images are never uploaded to a server or stored anywhere. Everything is processed locally in your browser. Your files stay on your device.
Downloads — After compression, you can either download images one by one manually or download all images together in a single ZIP file with one click. Clean, simple, and flexible.
Step-by-Step Guide to Use the Tool
Using mbtokb.site is straightforward. Here’s how it works:
Option 1: Custom Size Compression
1. Go to the custom compression tool on mbtokb.site
2. Upload your image (or multiple images)
3. Enter your desired file size in KB (for example, 80 or 120)
4. Click the Compress button
5. Download your compressed images
Option 2: Fixed Size Compression
1. Open the fixed-size page for the size you need (for example, the 100KB compressor)
2. Upload one or multiple images at once
3. Click Compress All
4. Download each compressed image individually, or download all images together in a single ZIP file with one click.
What Affects Image Quality After Compression?
Not all compressed images look the same. Several factors determine how good your image looks after compression.
Resolution
Higher resolution images have more pixels to work with, so they can handle more compression before quality suffers. Low-resolution images may look blurry even with light compression.
Compression Level
The more aggressively you compress, the smaller the file but also the more quality you lose. Finding the right balance is key. Our tool automatically finds the best balance for your target size.
File Format
Different formats handle compression differently. JPEG loses quality gradually. PNG stays sharp but compresses less. Choosing the right format for your use case makes a big difference.
Best Image Formats for Compression
Choosing the right file format is just as important as the compression level.
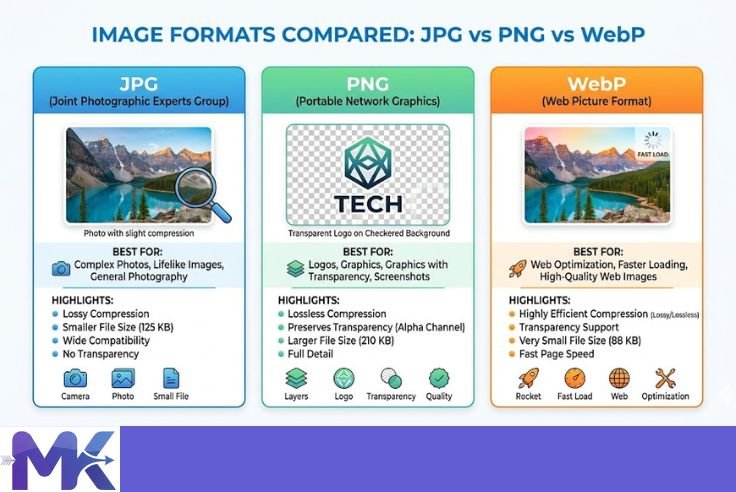
JPEG — Best for Photos
JPEG is the go-to format for photographs and complex images with lots of colors and gradients. It uses lossy compression to keep file sizes small. Great for blog images, social media, and product photos.

PNG — Best for Graphics
PNG is the best choice for logos, icons, screenshots, and images with text or sharp edges. It uses lossless compression, so quality is never sacrificed. However, file sizes are usually larger than JPEG.
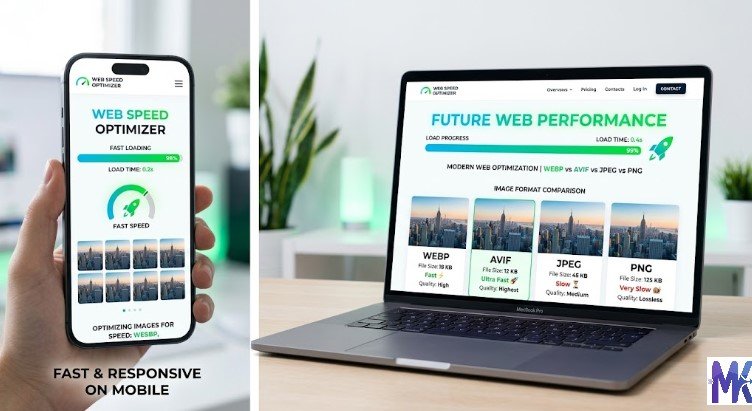
WebP — The Modern Choice
WebP is a newer format developed by Google. It offers better compression than both JPEG and PNG — delivering smaller file sizes with similar or better quality. More and more browsers now support it, making it an excellent choice for websites focused on speed.
FAQ’s
Image compression works by reducing the amount of data in an image file. It removes unnecessary details, simplifies colors, and stores the remaining data more efficiently. This makes the image smaller in size while keeping the visual quality as close as possible to the original.
You can use free online tools like mbtokb.site to compress images easily.
Just upload your image, choose a target size like 50KB or 100KB, and download the compressed file.
No installation or signup is required.
Yes, but it depends on the type of compression.
Lossy compression reduces some quality to make the file much smaller.
Lossless compression keeps 100% quality but reduces file size less.
For most websites, the quality loss is very small and not noticeable.
Lossy compression removes some image data permanently to reduce file size, which may slightly reduce quality.
Lossless compression keeps all original data, so there is no quality loss, but the file size reduction is smaller.
JPEG is best for photos because it gives a good balance of quality and small file size.
PNG is best for logos and graphics where quality matters more.
WebP is a modern format that offers better compression than both JPEG and PNG.
Conclusion
To sum it up: how image compression works comes down to one simple idea removing or reorganizing data to make files smaller without ruining the image.
Compressed images load faster, use less bandwidth, improve user experience, and help your website rank better on search engines. Whether you’re a blogger, a business owner, a student, or a developer, compression is a habit worth building.
The good news? You don’t have to understand all the technical details to benefit from it. Tools like the free bulk image compressor at mbtokb.site make it easy. Upload multiple images, choose your target size or pick a fixed option like 100KB or 150KB and download your compressed files in seconds.